XO-VAC+ connection to a LAN
The most convenient way to operate an XO-VAC+ is when it is connected to a LAN. It is however more complicated to set-up than a direct connection.
flowchart TD
    A[Router]
    B[PC 1]
    C[PC 2]
    D[PC n]
    E[Printer]
    F[XO-VAC+]
    A <-- 192.168.100.0/24 --> B
    A <-- 192.168.100.0/24 --> C
    A <-- 192.168.100.0/24 --> D
    A <-- 192.168.200.0/24 --> E
    A <-- 192.168.10.0/24 --> F
Pros:
- Network accessibility: XO-VAC+ can be accessed by any PC on its subnet (depending on the router parameters).
- Connection recovery: Client PC can be disconnected without disrupting the XO-VAC+ operation.
- Data logging: Logs and run data is stored by the XO-VAC+ embedded server even if the client PC is not connected.
Cons:
- Security: If badly configured, XO-VAC+ can be exposed to internet or to other users that should not be able to access it.
Warning
The XO-VAC+ embedded server should not be directly exposed to the internet as it is not updated as often as a regular Windows PC.
All XO-VAC+ are shipped with a static IP address as their default configuration. To connect an XO-VAC+ to a LAN, it is necessary to:
- change the XO-VAC+ static IP address or activate DHCP
- configure the router (firewall, routing table, etc.) to limit access to XO-VAC+ (not covered in this tutorial)
Hardware
The XO-VAC+ embedded server network interface is an Intel EC1000S. It supports 1.0 Gbps, 100 Mbps and 10 Mbps in Half Duplex or Full Duplex. By default, XO-VAC+ ships with the "Auto Negotiation" setting for "Speed and Duplex" and a MTU of 1500.
Changing the XO-VAC+ IP address
- Connect to XO-VAC+ using RDP with its current IP address
- Follow the steps below to change the XO-VAC+ IP address
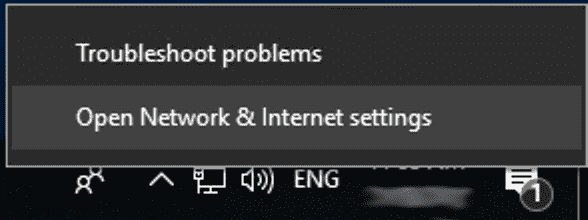
Right click on the Network icon at the bottom right of the Windows 10 Desktop and click on "Open Network & Internet settings".
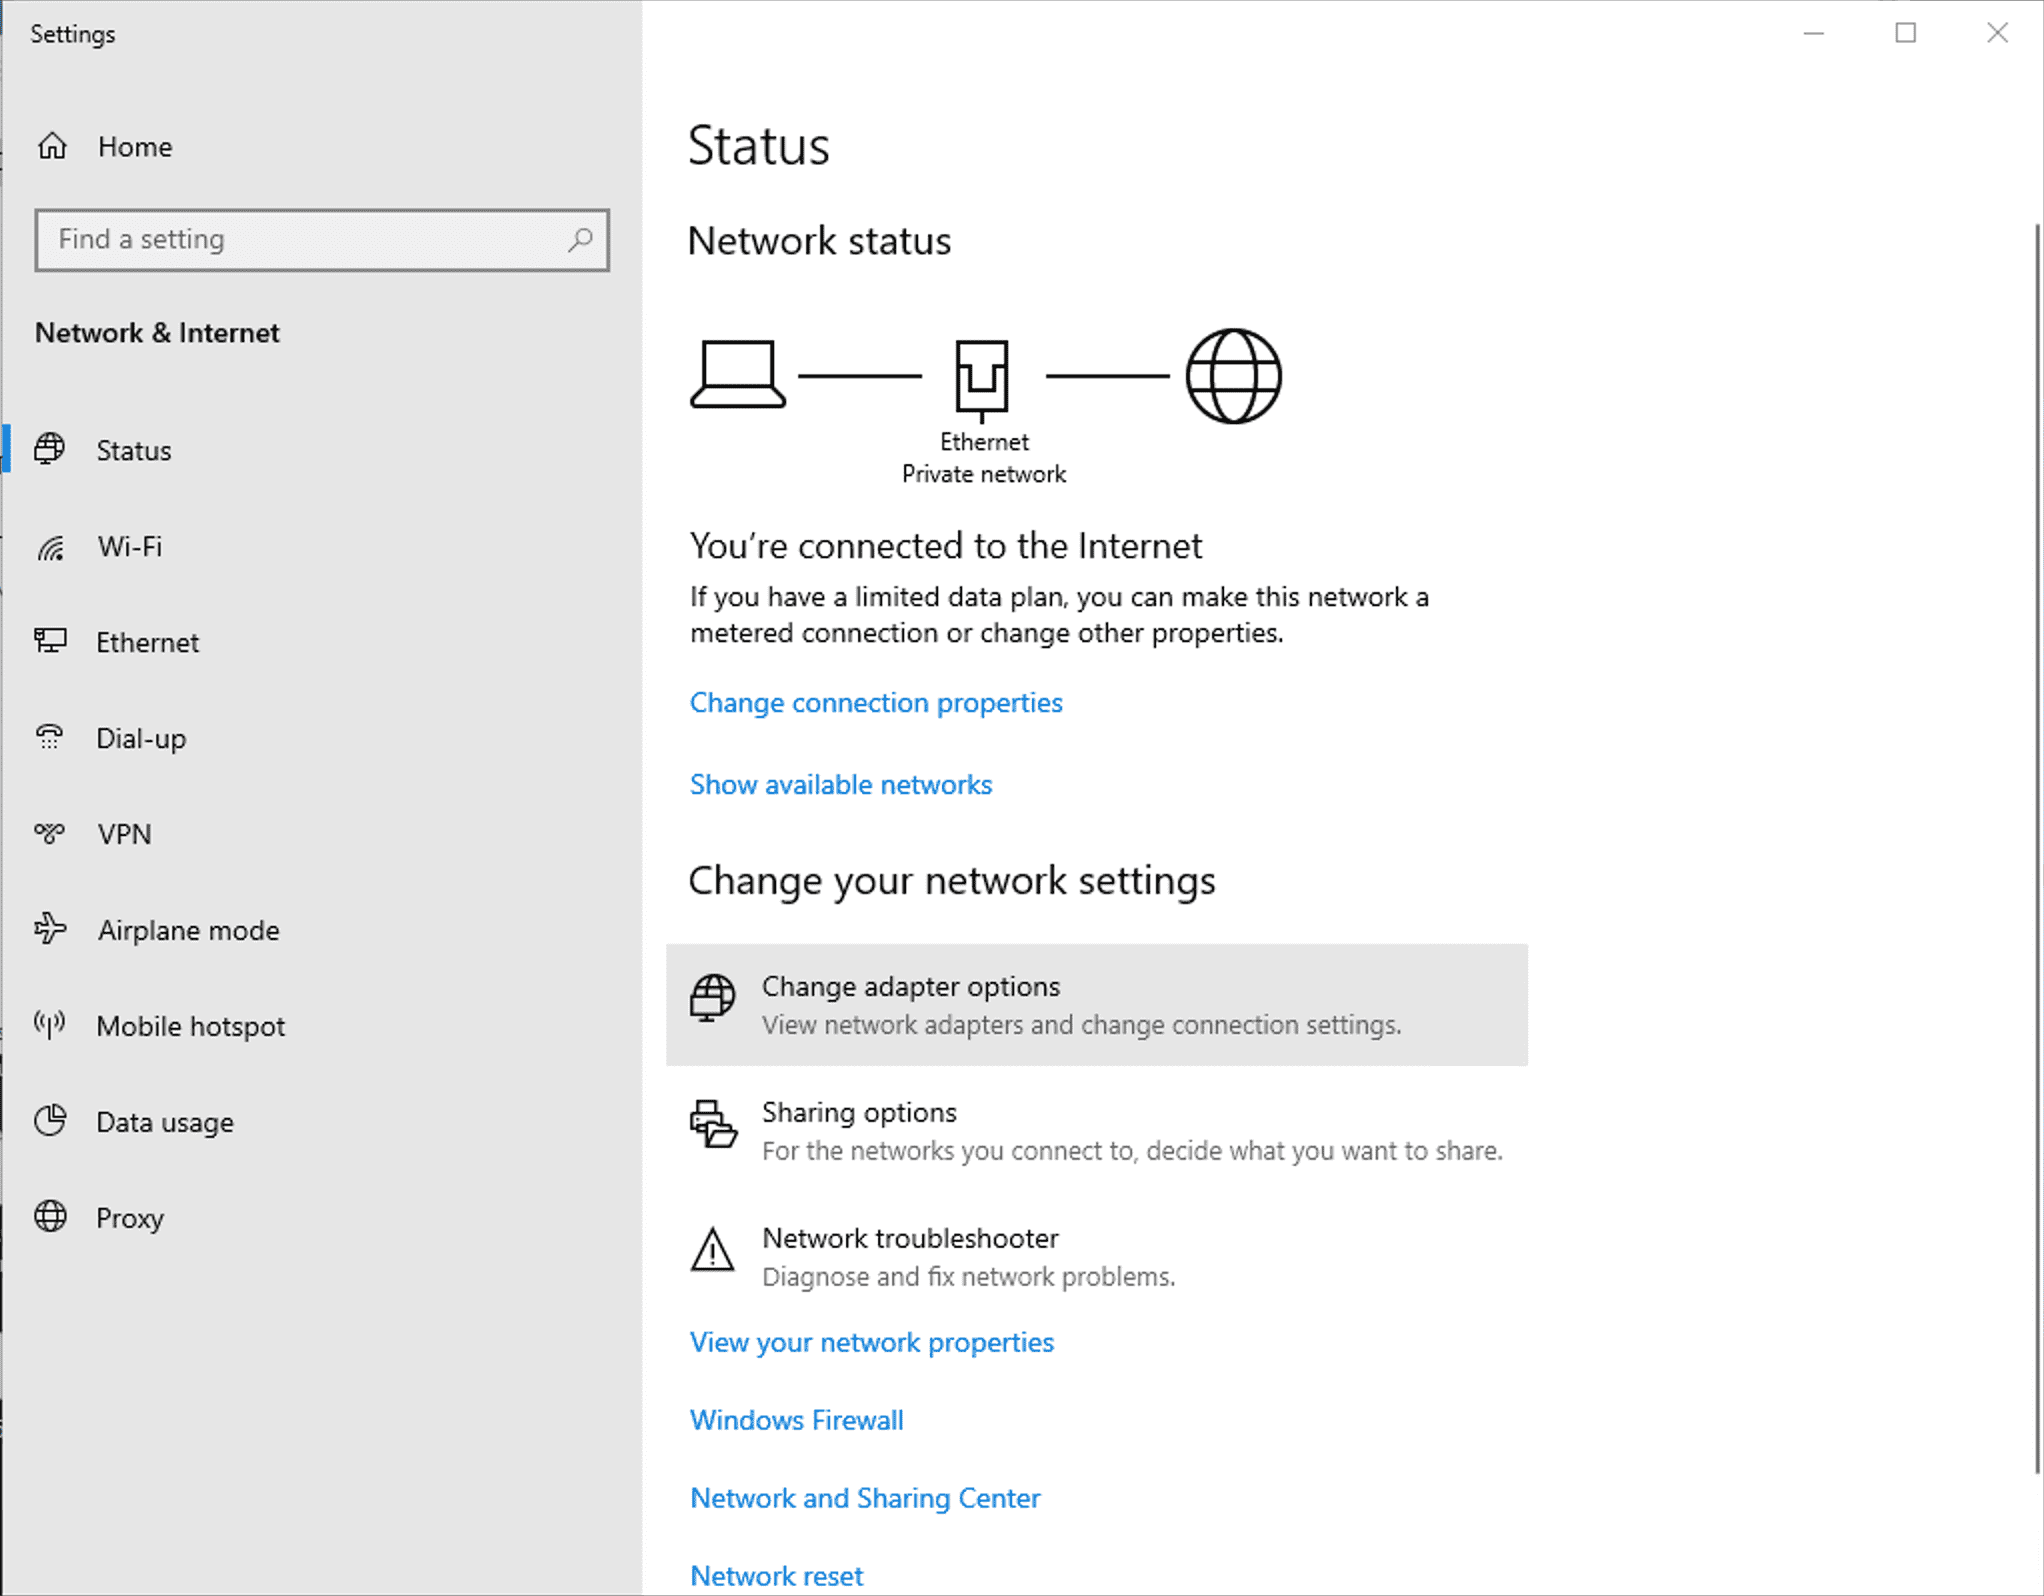
Then, click on "Change adapter options".
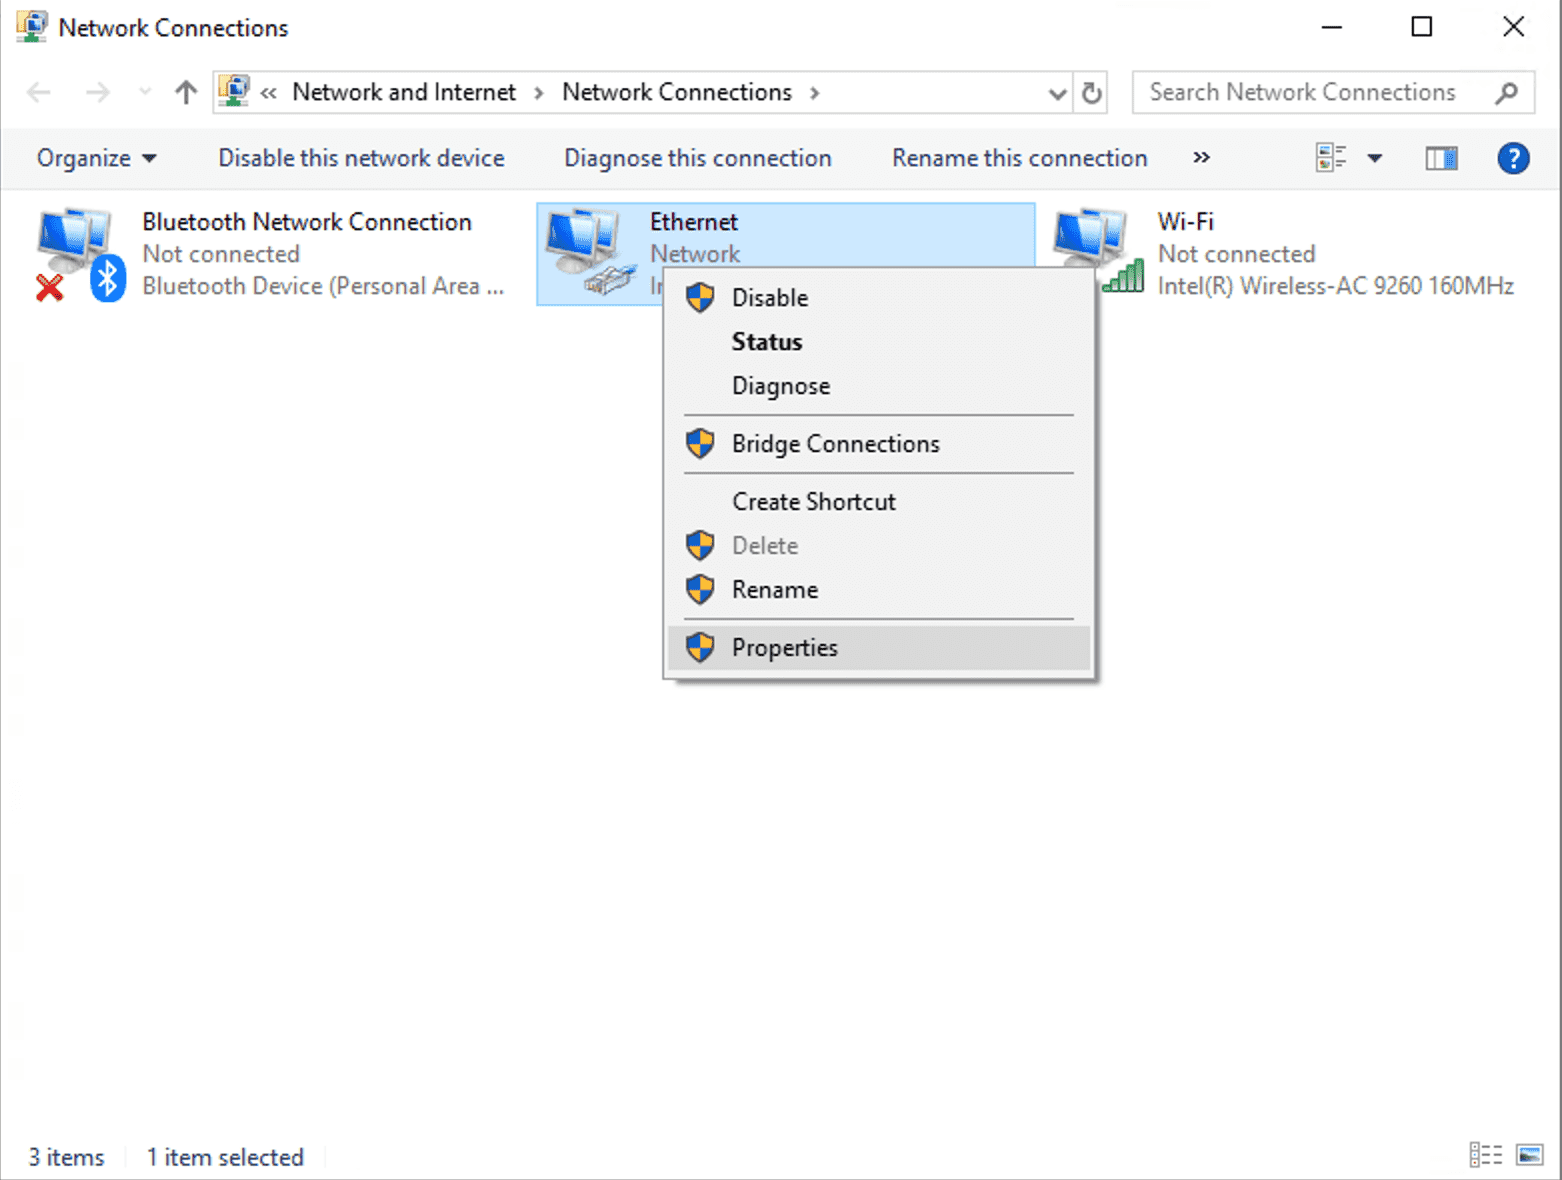
Right click on the XO-VAC+ network interface icon (Ethernet, Network, Intel EC1000S 1.0GbE Connection) and click on "Properties".
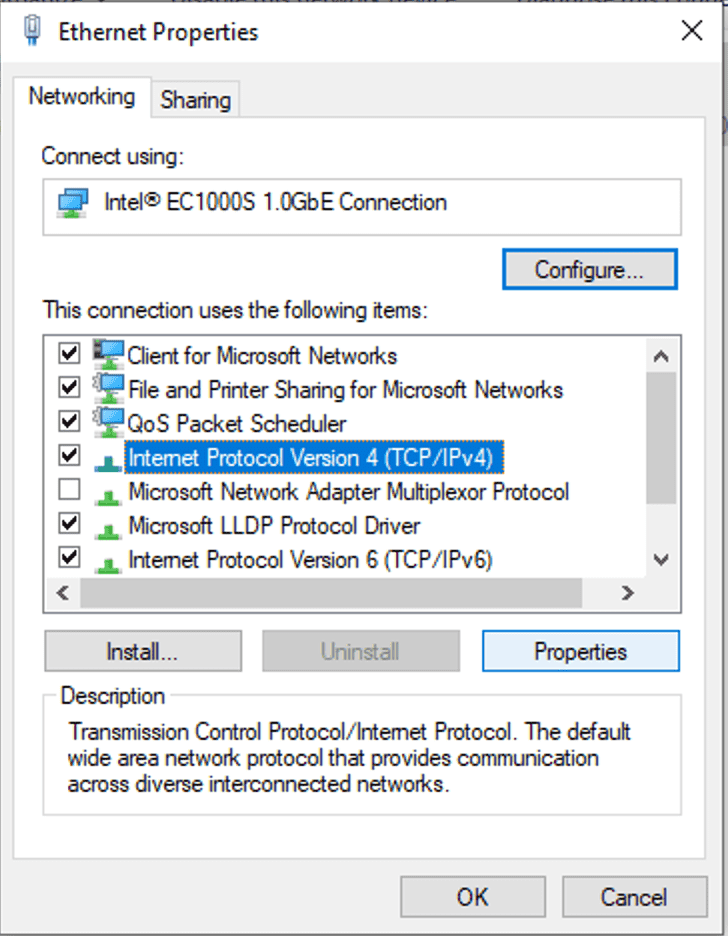
Select "Internet Protocol Version 4 (TCP/IPv4)" and click on "Properties".
Static IP address
Click on "Use the following IP address" and enter the new static IP address for XO-VAC+. Enter the subnet mask. (If you do not know what to enter, put 255.255.255.0). If needed, enter the gateway address.
Example
If the XO-VAC+ IP address is 192.168.1.91 and a 255.255.255.0 subnet mask is used, XO-VAC+ can have any IP address between 192.168.1.1 and 192.168.1.254.
Warning
Before assigning a static IP address to XO-VAC+, check that no other device is using this IP address.
Note
If XO-VAC+ is going to be connected a LAN with a DHCP server, assign the static IP address to XO-VAC+ on the DHCP server control interface.
Dynamic IP address - DHCP
Click on "Obtain an IP address automatically". The XO-VAC+ IP address will be dynamically assigned by the network DHCP server (probably your router).
Warning
Once XO-VAC+ is set-up to "Obtain an IP address automatically", it requires a DHCP server to obtain its IP address. To be able to do direct connections between XO-VAC+ and a client PC, you need to reassign a static IP address to XO-VAC+ before disconnecting it from the LAN.

Press "OK" to close the configuration window.
Connection check
Open a new Command Prompt window (Windows + R, type cmd and press "Enter") and try to ping XO-VAC+ on its newly assigned IP address (192.168.1.91 in the example below). If you have set-up XO-VAC+ with a dynamic IP address (DHCP), you need to find out what IP address was assigned by XO-VAC+ on your DHCP server. You can use the MAC address of XO-VAC+ (written on the back of XO-VAC+) to identify it.
If the ping is successfull, you can now open the XO-VAC+ User Interface software on your PC. Here is an example of a successfull ping:
ping 192.168.1.91
PING 192.168.1.91 (192.168.1.91): 56 data bytes
Reply from 192.168.1.91: bytes=32 time<1ms TTL=128
Reply from 192.168.1.91: bytes=32 time<1ms TTL=128
Reply from 192.168.1.91: bytes=32 time<1ms TTL=128
Reply from 192.168.1.91: bytes=32 time<1ms TTL=128
Ping statistics for 192.168.1.91:
    Packets: Sent = 4, Received = 4, Lost = 0 (0% loss),
Approximate round trip times in milli-seconds:
    Minimum = 0ms, Maximum = 0ms, Average = 0ms